Creating custom shoes is an art that combines creativity with craftsmanship. Whether you’re a seasoned artist or a DIY enthusiast, one of the key goals is to ensure your creations are not only eye-catching but durable too. At Angelus Direct, we understand the importance of longevity in custom shoe design, which is why we offer products specifically formulated to help you achieve the most durable customs possible. Follow this comprehensive guide to ensure your custom shoes stand the test of time.

Prep is Key!
The longevity of your custom shoes begins long before the first drop of paint is applied. Preparation is crucial to ensure the paint adheres properly and lasts as long as possible.
Step 1: Remove the Factory Finish
Start by using Angelus Leather Preparer and Deglazer (or acetone as an alternative) to remove the factory finish. This initial step is critical as it strips away the shoe's original factory finish, allowing your Angelus Paint to bond directly with the material. Normally, this step alone is enough to prepare your shoes for customization, but for those seeking to create the most durable custom possible, the next steps are vital.
Step 2: Light Sanding
After deglazing, lightly sand the shoe with high-grit sandpaper. Focus on areas that are prone to cracking, such as the toe box. It’s important to avoid the stitching during this process to prevent fraying or damage. This gentle abrasion creates a slightly rough surface that enhances paint adhesion.
Step 3: Apply an Adhesion Promoter
To go above and beyond in ensuring durability, apply an Adhesion Promoter. This product acts as a bridge between the shoe's surface and your paint, enhancing the bond and reducing the chances of peeling or cracking.

When Painting
The way you apply your paint can significantly affect the durability of your custom shoes.
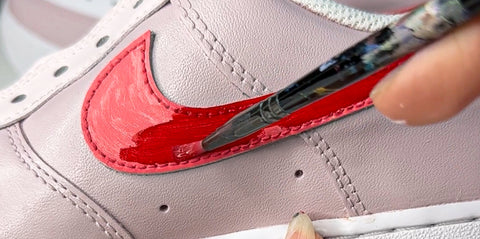
Use Light, Thin Coats of Paint
It’s tempting to layer on the paint to achieve vibrant colors quickly, but patience is key. Apply light, thin coats of paint, allowing each layer to dry completely before adding the next. This technique prevents the paint from becoming too thick, which can lead to cracking and peeling over time. 3-5 layers of paint is normally the sweet spot.
Allow Complete Drying Time
Each layer of paint should be completely dry before the next is applied. This patience ensures the best possible adhesion and durability of your design.

Finish for Durability
To maximize scratch resistance and protect your design, finish your shoes with Angelus 4-Coat. This product provides a durable top layer that protects against wear, ensuring your custom shoes remain vibrant and intact through many wears. It also changes the sheen of your project to your desired finish: Flat, Matte, Satin, or High Gloss.
Conclusion
By following these steps and using Angelus Direct’s specialized products, you can create custom shoes that are as durable as they are beautiful. Preparation, careful painting, and proper finishing are the keys to ensuring your custom shoes can be enjoyed for years to come.