
Angelus paints can be used for much more than custom sneakers. From custom clothing to furniture, you can use your skills to create a variety of personalized items and accessories that match your personal style.
To demonstrate this, Rick from @savethepanduhs created a custom leather jack tutorial, walking you through how to prep, paint, and finish a leather jacket. When done correctly, you'll be able to wear your leather jacket in any weather without worrying about your design chipping, peeling, or cracking.
Follow along to learn how to see for yourself how easy it is to customize a leather jacket and other leather accessories with Angelus paints.

How to Paint a Leather Jacket
To get started, you'll just need a few basic materials:
- Angelus Acrylic Leather Paint
- Paint Markers
- Angelus Leather Preparer and Deglazer
- Angelus Paint Brush Set
- Angelus Micro Detail Brush Set
- Angelus High Gloss Acrylic Finisher
After getting your materials together, follow these steps to create your own custom leather clothing.
1. Prepping the Leather
First, just like prepping leather shoes, you need to prep the jacket with either Angelus Leather Preparer and Deglazer or acetone. This will remove the jacket's factory finish to create a clean surface for the paint to adhere to.

Soak a cotton pad with a small amount of the Deglazer, and wipe down the entire area of the jacket that you plan to paint.
2. Using Paint Markers
Before painting the jacket, you can use Angelus paint markers to sketch your design. Free-handing is always an option, but outlining with a painting marker will help avoid mistakes once you begin painting.
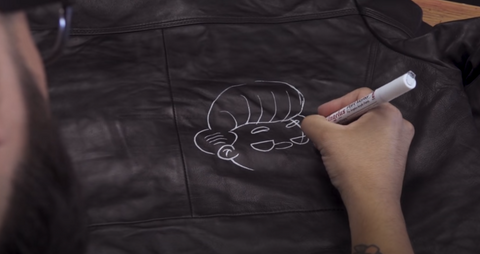
Angelus paint markers come empty, so to fill them, use a 1:1 mixture of paint and Angelus 2-Thin to make sure the paint is able to flow through the marker and fully-saturate the tip without clumping. We recommend using white paint or another light color for the outline as darker colors will be difficult to paint over.
3. Painting the Jacket
Once your jacket is prepped and the design is outlined, you can start painting your custom design.

Be sure to use several thin, even coats and allow each coat to completely dry before applying the next. Applying thick layers will make the paint more likely to crack or chip when you wear the jacket. If you don't want to wait for each coat to dry, you can use a heat gun to speed up the process.

This is your chance to get creative and choose the colors that you think best fit your design, but if you want to recreate the same jacket from the tutorial, make sure to check out the full video to see the colors Rick selected for his jacket.
4. Applying Angelus Paint
Once your design is complete and the paint is completely dry, the next and final step is to apply Angelus Acrylic Finisher to seal in the paint, create a custom finish, and protect the paint from minor scratches and scrapes.

Finishers are optional, but they are a great way to add an additional layer of protection and personal style to your custom jacket.
Use a paintbrush or airbrush to apply the finisher on the painted area of the jacket. For this project, Rick applied a high gloss finisher to the car and jacket to add contrast to the design.

Leave the finisher to dry, and once it is, your jacket is ready to go. You can wear it as normal without worrying about damaging your custom paint job.
More Custom Tutorials
If you want to check out more custom tutorials like this one, make sure to subscribe to the Angelus YouTube channel to learn tips and tricks from experienced sneaker artists.
Don't forget to also follow Angelus on Instagram and check out our online store to grab the tools you need to recreate this custom leather jacket!