Announced all the way back in 2012, Cyberpunk 2077 is finally being released after nearly a decade of anticipation.

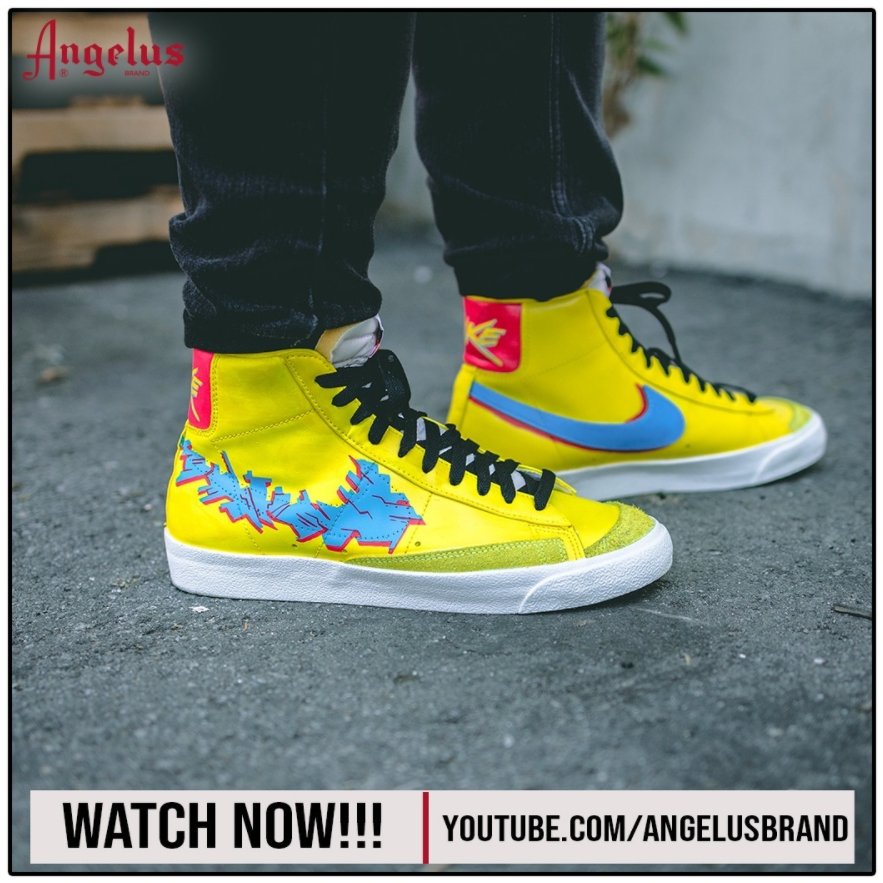
To commemorate the occasion, Bryan from @swellguycustoms stopped by to put together a tutorial demonstrating how to create a custom pair of Cyberpunk-themed Nike Blazers.
Check out the tutorial on YouTube for a detailed walkthrough, and read on for a quick overview on how to create your own custom Blazers.
Removing the Nike Swoosh
For these customs, Bryan created a custom Nike Swoosh to match the Cyberpunk aesthetic, and to do that, you need to start by removing the outside Swoosh from both shoes.

Use a detail knife to cut the stitching that attaches the Swooshes to the shoes, but be careful not to cut the surface.
After removing the Swooshes, you can use tweezers or nail clippers to remove the leftover frayed threads.
Removing the Factory Finish
Just like with any other custom project, it's important to prep the shoe before painting to make sure the paint adheres to the shoe and doesn't easily chip, peel, or crack.

To remove the factory finish from the Blazers, use a cotton swab and Angelus Leather Preparer & Deglazer to rub all of the areas that you intend to paint. This will create a clean finish for you to apply your custom design.
Before moving on, you can also tape off the midsole to prevent paint from getting on any unwanted areas.
Painting the Customs
After prepping, it's time to start painting the base of the shoes. For these customs, Bryan laid down a base layer of Pale Yellow paint, and on top of that, used a custom mixture of Thunder Yellow and Neon Sunset Yellow

Note: Since we're using an airbrush for this portion, you can mix four parts of Angelus paint with one part Angleus 2-Thin to make it easier for the paint to pass through the airbrush.

For the upper heel, use a brush to apply a base layer (or a few layers, if necessary) of pink, and follow it up with a mixture of Chili Red, Raspberry, and Jamaican Joy.
Creating a Custom Swoosh
Now, it's time to create the custom glitch effect for Nike Swoosh. Start by taping over the area where the original Nike Swoosh was, then use a pencil to trace the Swoosh on the tape using the leftover stitching holes.

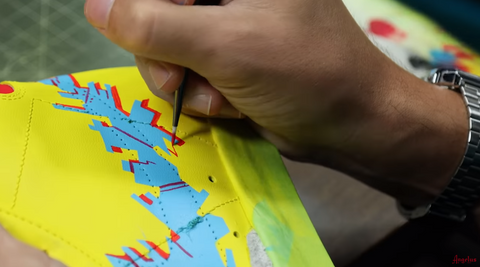
After tracing the Swoosh, use it as a reference to draw your custom glitch effect. To get the glitch effect, you want certain parts of your sketch to be jutting out of the Swoosh and other jutting into the original Swoosh.

Next, use a detail knife to carefully cut out your stencil. Then, you can use an airbrush to paint the custom Swoosh with a mixture of Pale Blue and Neon Bahama Blue.

Finally, peel the stencil off and use the same red mixture you used for the upper heel to outline the custom Swoosh, creating a clean drop shadow effect to give the design some depth. Do the same to the Swooshes on the inside of the shoes to create a more cohesive design.
Using Suede Dye
Nike Blazers also have suede patches on the toe and on the side above the midsole, so to make these patches match the rest of the shoe, you'll need to dye them using yellow suede dye.

You can use a paintbrush to apply the dye to the suede patches, but be careful as suede dye is a permanent alcohol-based solution -- you don't want to get any on areas other than the suede patches.
After applying the dye, wipe off any excess dye with a towel, and let the shoes dry for 24 to 48 hours before wearing.
Finishing Touches
The last thing to do is to use your airbrush to spray the shoe with Angelus Matte Finisher to give the shoes a clean finish.

Use a heat gun to dry the finisher after applying. In addition to giving the shoes a flat look, the finisher also helps protect the paint from minor scrapes and scratches.
After letting the shoes completely dry, you can lace them up and wear them as you normally would.
Make sure to subscribe to the Angelus YouTube channel or more tutorials like these and follow us on Instagram for custom sneaker inspiration.

