No matter what precautions you take, your customs are bound to get some scuffs and scratches over time.
Fortunately, though, a few scratched aren't the end of the world. With a few useful products, you can restore your customs to like-new condition in no time.
Sal Aceves, AKA @Salthesneakerhead, stopped by the Angelus studio to show you how to easily repair scuffs and scratches, using an old pair of Jordan 1 "Black Toe" beaters as an example.
Keep reading to see how you can mend your damaged customs in just a few simple steps.

First thing's first, you're going to want to start off by getting those customs nice and clean.
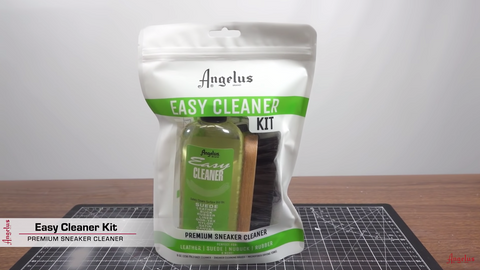
Using the Angelus Easy Cleaner Kit, pour some Easy Cleaner into a bowl, dilute it with a little bit of water, and use a brush to gently scrub your shoes to get rid of any dirt. Use a microfiber cloth to wipe away the dirt without damaging the shoe.
Repeat this process as many times as you need to ensure that the entire shoe is completely clean.

Before you start painting, you need to sand down the scuffs to create a smooth surface.
Start with 600-grit sandpaper before moving onto 800-grit. Then, use 3,000-grit sandpaper to finish things off and create a completely smooth finish. This way, the paint will stick to the surface and you won't be able to notice the scuffs through the paint.
Then, use some Leather Preparer and Deglazer to prepare the area before painting.

Now, it's time to start painting.
For this pair of 2016 "Black Toe" 1s, Sal used a mixture of about 60% Red, 10% White, and 30% Varsity Collector Edition.
Of course, if you're painting a different shoe, use a mixture that matches the color of your customs.
Once you get the mixture right, pour the paint into your airbrush to get started. If your paint is thick, use a little bit of 2-Thin as you see fit.
Using your airbrush, apply multiple thin coats of paint to your shoe, allowing each layer to completely dry before moving onto the next.
To fix the scuff, apply a little bit of extra paint over the affected area, and use 3,000-grit sandpaper to work the paint into the scuff.

After painting, use a Q-Tip to paint over any small scuffs or scratches on the rest of the shoe.
Small scratches don't need to be completely repainted, so this will save you some time and paint without sacrificing the quality of the final product.

Next, you can apply some Lustre Cream to help bring out the original color of the shoe. Apply with a microfiber cloth and wipe away any excess with a brush.
Use Neutral Lustre Cream for lighter colors and Black Lustre Cream for any black sections of the shoes.
This will help you avoid having to repaint sections that aren't damaged.

To restore the quality of your soles, use a brush to apply Sole Bright along the sole. Sole Bright gets rid of any yellow tint that has developed over time.
This product can cause damage to and dry out the leather, so be sure to tape off the upper before applying the Sole Bright.
After applying, wrap your shoes in some saran wrap and set them out in the sun for best results.

Lastly, Sal used a mixture of Matte Finisher and Duller to protect the paint from scratches and to give the shoes a finished look.
Simply use a brush to apply a layer of the finisher and use a heat gun to set it.

That's all there is to it! By following these steps, you can have your customs looking new in no time.
For a more detailed walkthrough, make sure to check out Sal's full tutorial on our YouTube channel, and don't forget to follow Angelus on Instagram to see more customs and tutorials like this one.

