Scooters are more than just a mode of transportation; they are an extension of personal style. A well-customized scooter stands out, and one of the best ways to achieve a unique look is through custom painting. Whether aiming for a sleek, modern design or a bold, artistic statement, customizing scooter body parts with paints is an exciting project that allows for endless creativity.
This guide will walk through the step-by-step process of customizing scooter body parts using paints, covering essential materials, preparation, painting techniques, and finishing touches. From priming to applying protective coatings, this detailed guide ensures a professional-quality paint job that enhances both aesthetics and durability.

Essential Materials and Setup
Before starting, it’s crucial to gather all the necessary materials and set up a proper workspace to achieve the best results.
Materials Needed:
-
Spray Paint – High-quality automotive spray paint designed for plastic and metal parts.
-
Primer – A suitable primer to improve adhesion and longevity.
-
Clear Coat – Protects the paint and gives a glossy or matte finish.
-
Sandpaper – Various grits (80, 120, 220, 400) for surface preparation.
-
Painter’s Tape – For masking off areas that should not be painted.
-
Degreaser or Cleaning Solution – Removes dirt, grease, and oils before painting.
-
Gloves and Safety Mask – Protects hands and respiratory system from fumes.
-
Soft Cloths and Microfiber Towels – For cleaning and dust removal.
-
Stencil or Decals – If adding custom graphics.
-
Spray Gun or Airbrush (Optional) – For precision painting.
Setting Up the Workspace
A well-ventilated and dust-free workspace is crucial for a flawless paint job. Follow these steps to create the ideal setup:
-
Choose an open, well-ventilated area such as a garage or outdoor space with minimal wind.
-
Lay down newspapers or a drop cloth to prevent paint from staining floors.
-
Hang plastic sheets if painting indoors to avoid overspray on walls and surfaces.
-
Use proper lighting to spot imperfections during the process.
-
Ensure all tools and materials are within reach before starting.
Preparation Steps
The key to a smooth and long-lasting paint job lies in proper preparation. Follow these essential steps to get the scooter parts ready for painting.
Dismantling the Scooter
To achieve even coverage and avoid overspray on unwanted areas, it is best to remove the parts that will be painted.
-
Use a screwdriver or wrench to carefully remove panels, fenders, and other parts.
-
Take pictures during disassembly for easy reassembly later.
-
Place small screws and bolts in labeled containers to avoid losing them.
Cleaning and Sanding
-
Clean the Surface – Use a degreaser or soapy water to remove dirt, grease, and debris from the scooter body parts.
-
Sanding – Start with 80-grit sandpaper to remove old paint or rough surfaces. Progress to 120- and 220-grit sandpaper for a smoother finish.
-
Final Wipe Down – Wipe the sanded surface with a damp microfiber cloth to remove dust particles.
Priming Your Scooter Parts
A primer creates a strong foundation for the paint, ensuring better adhesion and durability.
-
Choose the Right Primer – Use a plastic primer for plastic parts and a metal primer for metal parts.
-
Apply Thin Coats – Hold the spray can about 8-12 inches away from the surface and apply a light, even coat.
-
Allow Drying Time – Follow the primer’s instructions for the recommended drying time, typically 15-45 minutes.
-
Light Sanding – Once dry, use 400-grit sandpaper to smooth out imperfections before applying paint.

Painting Techniques
Now comes the fun part—applying color to your scooter body parts.
Applying Base Coats
-
Shake the spray paint can well before use.
-
Hold the can at a consistent distance of 8-12 inches.
-
Apply the first coat lightly, using smooth, sweeping motions.
-
Let each coat dry for about 10-15 minutes before applying the next one.
-
Apply at least 2-3 coats for a solid, even finish.
Achieving a Smooth and Even Finish
-
Always spray in a well-ventilated area.
-
Use even, overlapping strokes to prevent streaks.
-
Avoid heavy application to prevent paint drips.
-
Let the base coat cure for at least an hour before proceeding to the next step.
Adding Custom Graphics and Details
If you want to take your scooter customization to the next level, adding unique graphics and personalized designs is a great way to make it stand out. Customizing your scooter with graphics can give it a completely fresh and distinctive look, making it a true reflection of your personality and style.
There are several methods to achieve this, ranging from using pre-made stencils and decals to freehand painting intricate designs. Whichever method you choose, careful preparation and attention to detail will ensure a professional-looking finish.
Using Stencils and Decals
One of the easiest and most effective ways to add custom graphics is by using stencils and decals. Stencils allow you to create clean, precise patterns, while decals offer a hassle-free way to apply pre-made designs. Here’s how to use stencils effectively:
-
Secure the Stencil Properly – Position the stencil on the scooter part where you want the design to appear. Use painter’s tape to firmly secure the stencil in place, ensuring it doesn’t shift during the painting process.
-
Apply a Light Coat of Paint – Using spray paint or a brush, apply a thin, even layer of paint over the stencil. Light coats help prevent bleeding and ensure sharp edges.
-
Allow Partial Drying – Let the paint dry slightly but not completely before carefully lifting the stencil. This prevents smudging while ensuring the edges remain crisp and clean.
-
Repeat if Necessary – If you want a more defined or darker look, you can apply multiple thin layers, allowing each to dry before reapplying.
Decals, on the other hand, can be directly applied to the surface of the scooter. Simply peel off the backing, position the decal carefully, and smooth it down using a soft cloth or plastic scraper to eliminate air bubbles.
Freehand Painting
For those who have a steady hand and an artistic touch, freehand painting allows for endless creative possibilities. Whether using an airbrush, fine paintbrushes, or paint pens, freehand painting lets you add intricate details and unique patterns to your scooter. Here are some tips for freehand painting:
-
Choose High-Quality Paints – Acrylic or enamel paints work best for durability and color vibrancy.
-
Use an Airbrush for Smooth Blending – An airbrush is excellent for creating gradient effects, shadows, or complex designs with seamless transitions.
-
Outline Before Painting – If you're not confident in freehand drawing, use a pencil or chalk to sketch your design before applying paint.
-
Work in Layers – Start with lighter colors and gradually build up darker shades for a more detailed and polished look.
-
Take Your Time – Painting intricate designs requires patience. Allow each section to dry before moving on to the next to avoid accidental smudges.
Applying the Final Touches
Once your design is complete, applying a protective topcoat will help preserve the paint job and enhance its longevity. A clear coat provides a protective barrier against scratches, UV rays, and everyday wear and tear. Follow these steps to ensure a perfect finish:
-
Select the Right Clear Coat – Choose from glossy, matte, or satin finishes based on your preferred look. A glossy finish adds shine, while a matte finish gives a subtle, modern appearance.
-
Apply Light, Even Coats – Hold the spray can or brush at a consistent distance and apply multiple thin layers rather than one thick coat to prevent cloudiness or drips.
-
Allow Ample Drying Time – Let the clear coat dry for at least 24-48 hours to ensure complete curing before using the scooter. Rushing this step may result in smudges or an uneven finish.

Reassembling and Post-Painting Care
Once the paint has fully dried and the clear coat has set, it’s time to carefully reassemble the scooter. Proper reassembly ensures that everything functions smoothly and that your hard work remains intact.
-
Refer to Disassembly Photos – If you took photos during the disassembly process, use them as a reference to put everything back together correctly.
-
Secure All Screws and Bolts – Double-check that all screws and bolts are tightened properly to prevent parts from loosening during use.
-
Regular Cleaning and Maintenance – To keep your scooter looking fresh, clean it regularly with mild soap and water. Avoid using harsh chemicals that may damage the paint.
-
Apply a Protective Wax Coat – Every few months, apply a light wax coat to enhance protection against dust, dirt, and minor scratches.
Troubleshooting Common Painting Issues
Even with careful preparation, painting can sometimes lead to unexpected issues. Here are some common problems and how to fix them:
-
Drips and Runs – If the paint runs or drips, lightly sand the affected area once it’s dry and apply thin, even coats for a smoother result.
-
Bubbles – Bubbles often form due to painting in humid conditions. If this happens, sand the area gently and repaint under better environmental conditions.
-
Uneven Finish – A rough or streaky finish can result from inadequate sanding or uneven spray application. Ensure smooth sanding before painting and apply paint in consistent, overlapping strokes.
By following these steps, you can achieve a professional-quality custom scooter that reflects your style while maintaining durability and longevity. Whether you opt for stencils, decals, or freehand painting, a well-executed paint job will turn your scooter into a true work of art.

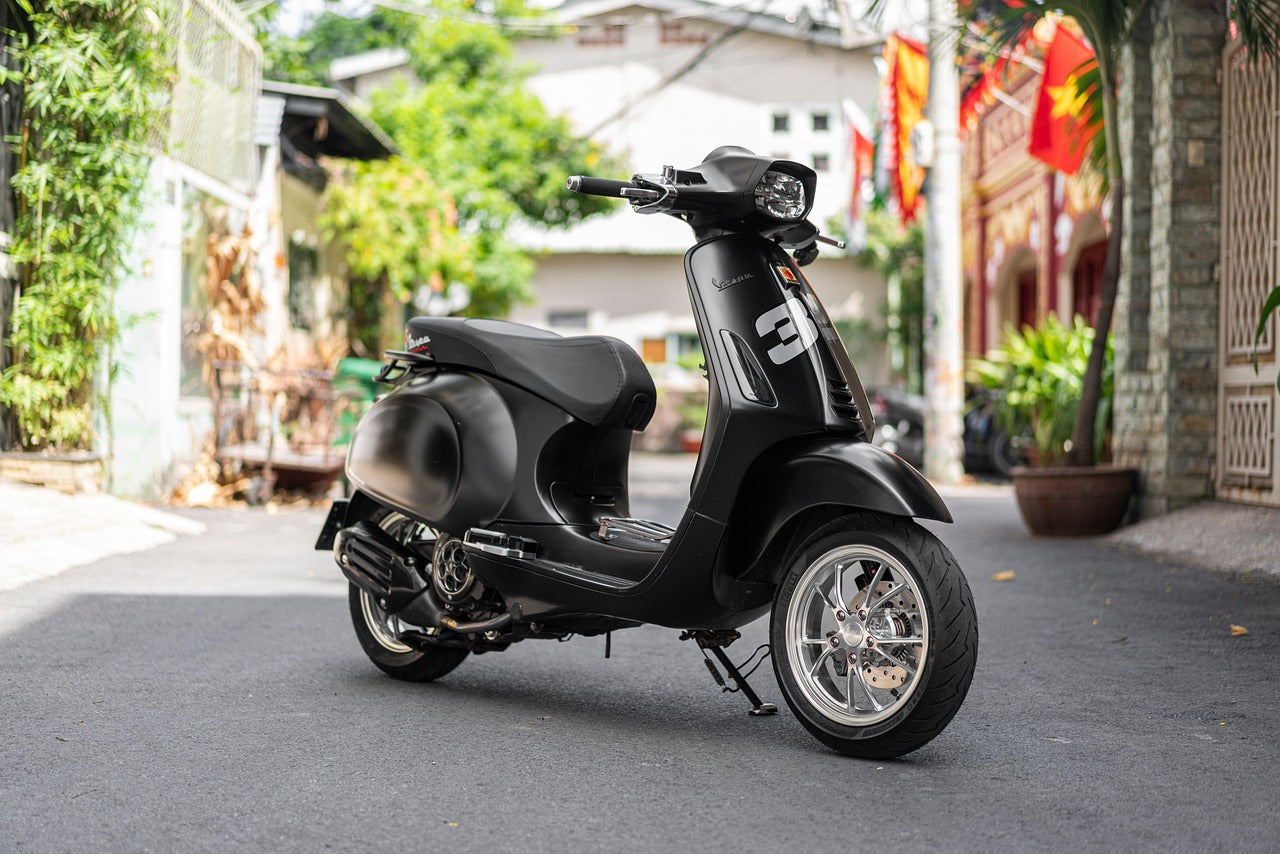
(Source: @_ferdan)
Customizing scooter body parts with paint is a rewarding project that adds a unique touch to any ride. With the right preparation, techniques, and finishing touches, a scooter can be transformed into a true reflection of personal style.
High-quality paints and accessories ensure long-lasting results. For those seeking premium finishes, professional-grade paints and customization tools from Angelus Direct can help achieve a sleek and durable look.
FAQs
How long should I wait between each coat of paint?
A drying time of 10-15 minutes between light coats is ideal to prevent drips and ensure smooth application.
What type of paint is best for plastic and metal scooter parts?
Automotive-grade acrylic spray paint offers excellent adhesion and durability for both plastic and metal parts.
Is it necessary to disassemble the scooter for painting?
While not mandatory, dismantling ensures even coverage and prevents paint from getting on unwanted areas.
How can I make my scooter’s paint last longer?
Applying a high-quality clear coat and waxing the surface periodically will help maintain the paint job’s durability.
Any quick tips for first-time painters?
Start with a light coat, maintain even strokes, and always let each layer dry completely before adding the next. Using professional-grade paints and finishes can also help achieve better results. High-quality paints and customization accessories from Angelus Direct ensure a smooth application and long-lasting finish.