
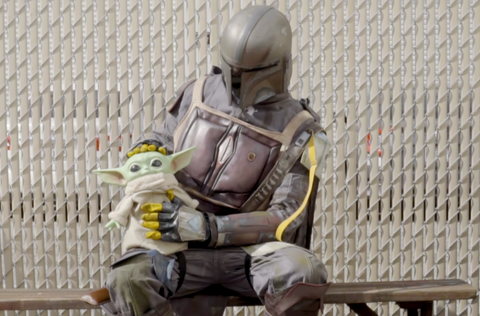
With Halloween right around the corner, it's time to get those costumes ready and if you're into creating customs a one-of-a-kind costume is a no-brainer. Tommy from @beargallery stopped by Angelus to show how you can take a store-bought Mandalorian costume and make it look like the real thing. From bullet holes to gashes, the right custom details will give this costume that authentic look.
Supplies:
Black Paint
Dark Brown Paint
Beige Paint
Sandpaper
Leather Preparer and Deglazer
Bronze Paint
Light Brown
Angelus Detail Brush #2 Round
White Paint
Grey Paint
Avocado Paint
Pewter Paint
Airbrush
Detail Knife

Jacket & Pants
With so many parts to the costume, he works on giving each one that custom touch. Starting with the jacket and the pants, black, dark brown and beige paint are mixed with some water and then applied with a sponge to give the fabric that worn in feel. Tommy focused on the edges where the jacket would be most likely to show its age. Thinning it out with water helps apply the paint more like a stain.

Leather Armor
The goal with the leather pieces of the costume are to make them look like metal. First they have to prepped with some sandpaper and Leather Preparer and Deglazer. Mixing together dark brown and beige paint will add a primary layer of texture. To add that metal look he swiped on some Bronze paint on top.

Next it's time to add some intense wear to these pieces with some bullet holes and gashes for that real armor effect. For the bullets he starts with a circle in a dark color and then adds a shadow in dark brown on top and a highlight below in lighter brown using a Q-tip. Crack marks are added with a detail brush like Angelus Detail Brush #2 Round. Put your longer cracks on the bottom of the bullet holes and shorter ones up top so it feels like you're looking up at the bullet. Having your darkest shadows and lightest highlights next to each other will really make them stand out. Some Dark Brown Paint under the hole gives it even more dimension. White mixed with silver on top of the highlights helps finish these bullet holes off.
He also adds grey to any area where he wanted to make it look like chipped paint. Adding the same highlights on top like he did with the bullet holes helps give these chipped paint sections the same realistic look. Adding Avocado Paint with a sponge to different sections gives this armor a mossy, well-worn feel.

Helmet
To give the plastic helmet the same look he sanded it and added some big scratches with a knife. He gives the helmet a metallic look by mixing Pewter Paint and Bronze Paint then applying it with an airbrush. By making the edges and cracks look rusted with darker layers of metallic paint Tommy was able to make the helmet look perfectly aged.

Cape
To age the cape he frayed the bottom edge with sandpaper and a detail knife to make it thoroughly shredded. He was able to use the waste water from cleaning his brushes to paint the bottom of the cape with a sponge to make it look muddy.

Leather Accessories
For the leather holster and gloves he adds a medium and light brown, putting emphasis on the areas that would see the most wear and tear. First the leather needs to be sanded and prepped with Leather Preparer and Deglazer. Because the leather on a costume can be cheaper, test a hidden spot first to make sure that the Leather Preparer and Deglazer doesn't eat away too much at the material.
The shoes get the same treatment, with some added highlights in different browns to give them that battle-worn look. He focuses on the toes and heels where you would naturally see the most wear.
More Custom Tutorials
If you want to see more custom tutorials like this one, make sure to subscribe to the Angelus YouTube channel to learn tips and techniques.
Also, make sure to follow Angelus on Instagram and check out our online store to grab the materials you need to create your own custom designs!
