
Angelus Direct knows that one of the best things about customs is that you can create what you can't have. Whether it's a one of a kind piece you've seen and want to recreate or a completely original idea, if you have the right supplies and skills you can create just about anything.
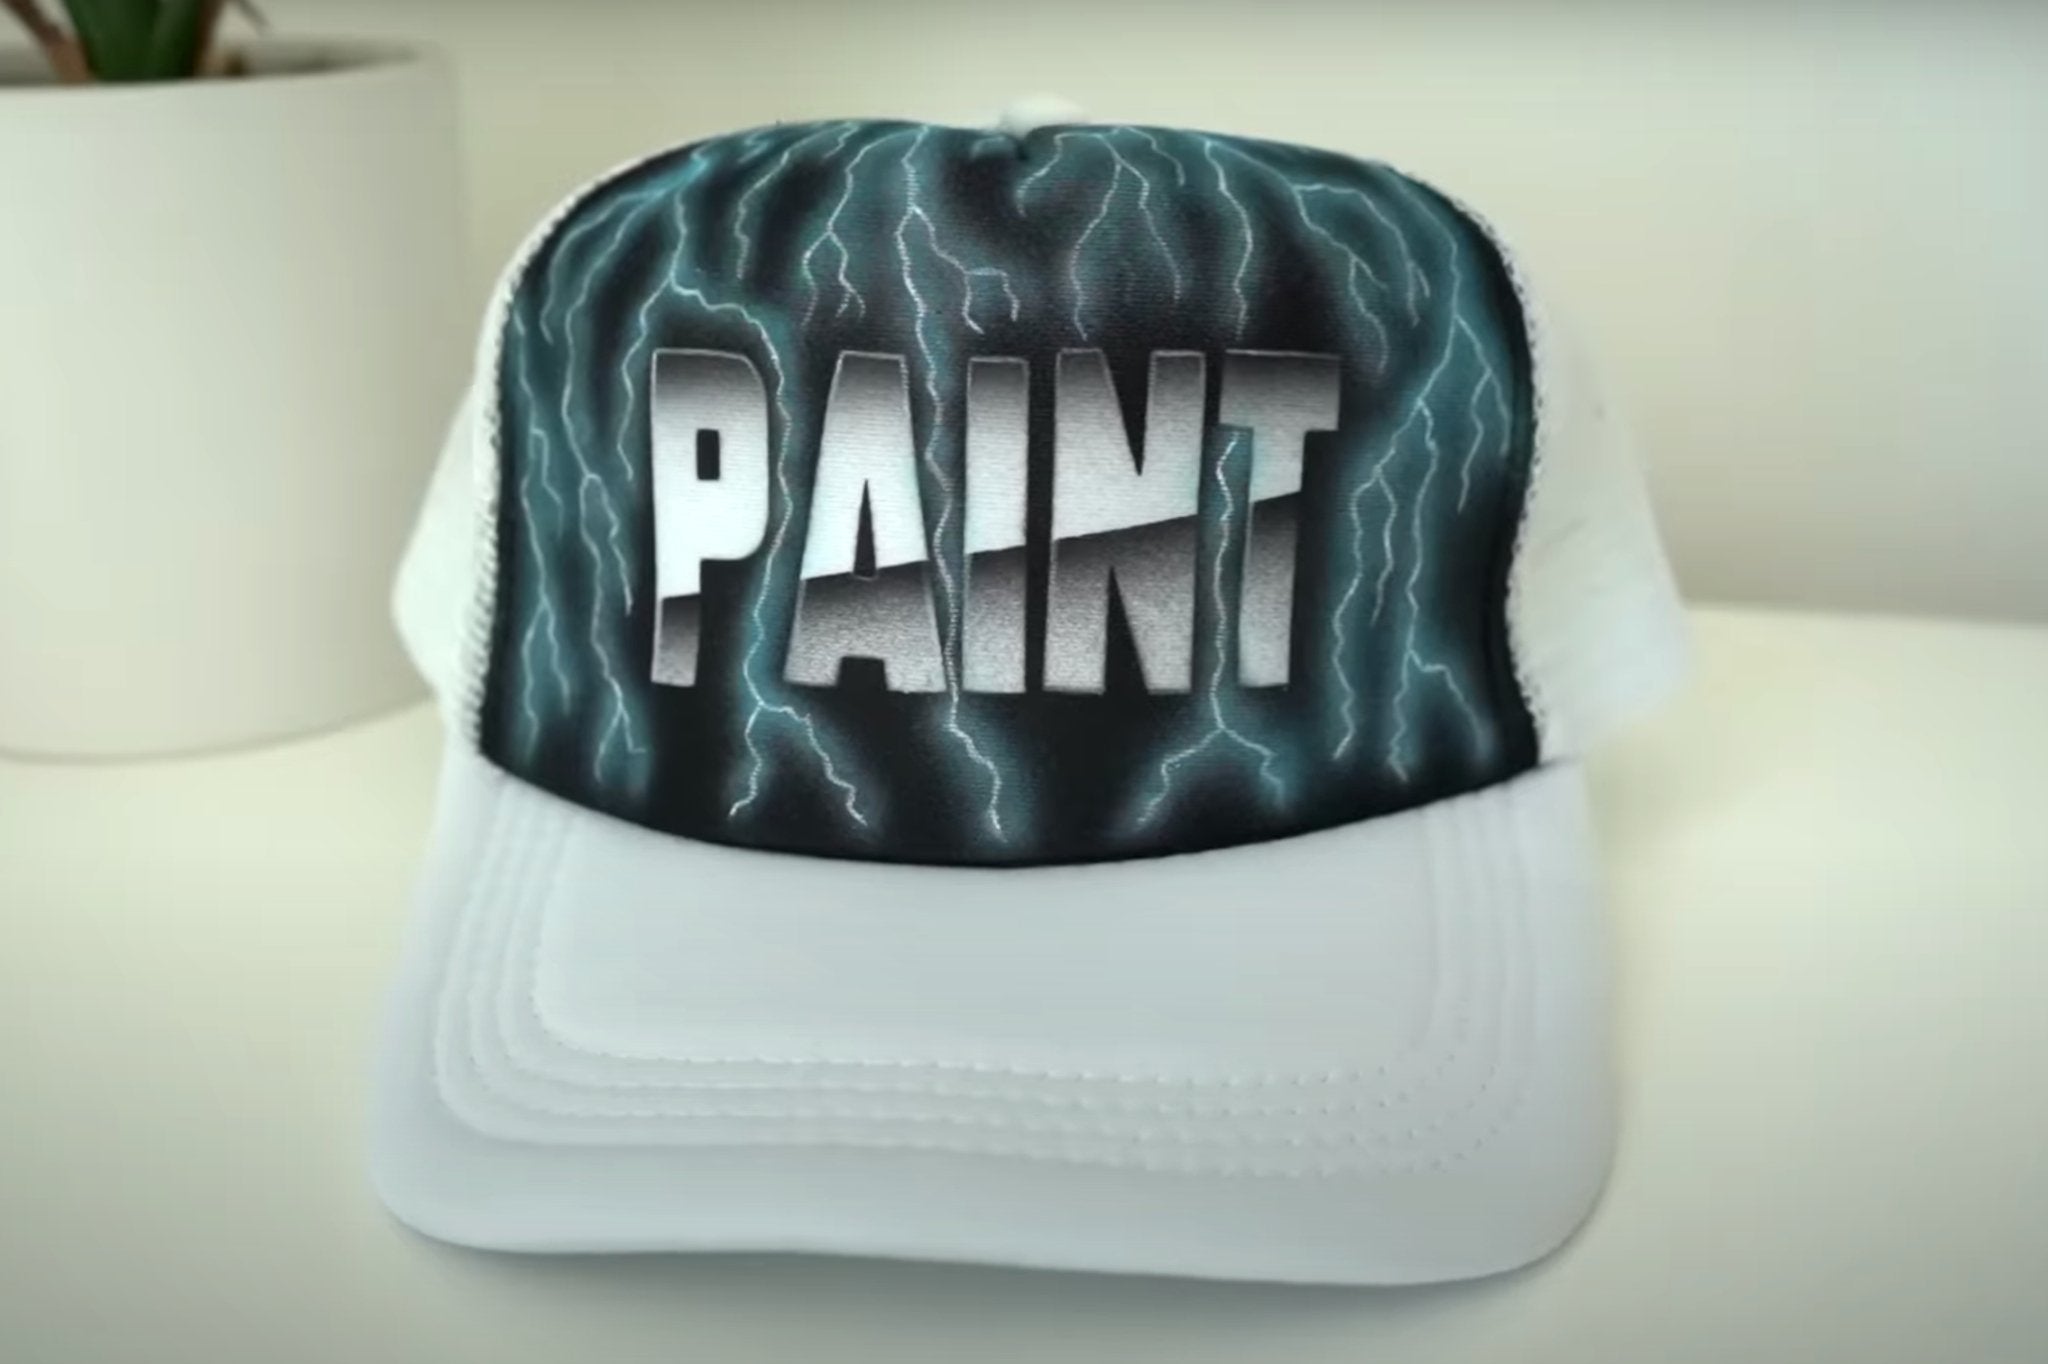
That's true of this custom trucker hat that features a chrome and lightning design. We'll walk you step by step through the instructions and supplies you need to recreate your own version.
Supplies:
-Trucker Hat
-Vinyl Stencil
-Transfer tape
-Pencil
-Angelus Neon Bahama Blue Paint

Step 1: Tape off your hat
Prep work can be as important as the painting you do. With the right prep you can ensure you have less cleanup work to do at the end and have a flawless design. That's why it's important to tape off any areas of the hat you don't want painted with Premium Masking Tape, like the visor or mesh areas on this trucker hat.

Step 2: Create your stencil
A vinyl stencil is a versatile tool you can use to apply as simple or as complicated a design as you want with absolute precision. Simply trace the design on the vinyl stencil and cut it out using a detail knife. Transfer tape applied on top of the stencil makes it even easier to put your stencil in place. Just put the transfer tape over your vinyl stencil, remove the elements you don't need and use it to transfer the remaining design.
For this custom two stencils that are mirror images of each other are used to work on each part of the area that's going to be painted. First the stencil with the letters is applied so the background can be painted first.

Step 3: Airbrush the background
There are many designs where an airbrush is essential and this is one of them. First a background is applied in flat black. Mix a 1:1 ratio of 2-Thin with the black so the paint moves through the airbrush easily. You could also use 2-Soft here, which will also help thin the paint while keeping the painted fabric soft, just remember it has to be heat set after.
Once you've applied several thin coats that have fully dried in between each painting you can remove the stencil.

Step 4: Airbrush the text
It's now time to apply the stencil that revels the letters so the text can be painted. To create that reflective chrome look masking tape is applied over the stencil at an angle. By controlling the mist and distance at which you use the airbrush you can create a gradient effect by applying a mist of paint along the tape. Remove the masking tape and apply the same gradient look along the top.
Outline the top and sides of the letters in white to help the text stand out.

Step 5: Painting the lightning
Use a pencil to applying the lightning pattern by drawing squiggling lines in random patterns over the background. Then outline all the lightning by painting it white. Go over each painted lightning strike in white with the airbrush to again create that gradient effect.
Add some color with a 50/50 ratio of Angelus Pale Blue Paint and Angelus Neon Bahama Blue Paint. Spray this custom blue over the white that has already been sprayed. Go back over the lightning in white paint to finish off the effect.
Remove the tape and you have your own lightning and chrome effect custom trucker hat!
More Custom Tutorials
If you want to see more custom tutorials like this one, make sure to subscribe to the Angelus YouTube channel to learn tips and techniques.
Also, make sure to follow Angelus on Instagram and check out our online store to grab the materials you need to create your own custom designs!