How to Paint a Denim Jacket with Angelus Paints: A Step-by-Step Guide
Are you looking to add a unique touch to your wardrobe? Painting your own custom denim jacket using Angelus products is a fun and creative way to express your personal style. Here's how to paint a jeans jacket and transform plain denim clothing into a piece of wearable art. (Art featured by @sophiesophss)
Watch the in depth tutorial here!
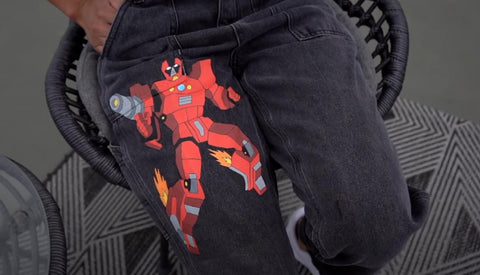
Custom Painted Denim: What Paint to Use on Jeans?
Before diving into the process, many wonder: what paint to use on jeans? The best choice is acrylic paint for jeans mixed with a fabric medium or using high-quality fabric paint for denim. Angelus Acrylic Paints work well for this purpose, providing vibrant colors and durability.
Step 1: Gather Your Materials
Before you start, make sure you have the following items:
A piece of denim clothing
Paint Brushes (various sizes)
Angelus 2-Soft Fabric Medium (Optional)
A heat gun (optional | required if using 2-Soft)
4-Coat Matte and/or Water & Stain Repellent
Step 2: Prepare Your Jacket
Start by setting up a clean workspace and lay out your jacket flat. Use masking tape to cover any parts of the jacket you do not wish to paint, such as buttons, zippers, or labels. Use a lint roller or masking tape to remove and lint or dust from the surface.
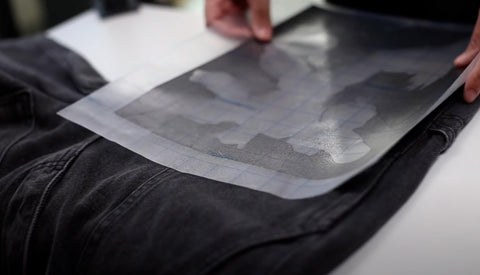
Step 3: Place your Stencil (if you have one)
Always place your stencil on a clean area. If you are using a vinyl stencil, applying a little heat with a heatgun or blow dryer will help secure it to the denim, giving you cleaner lines when you pull the stencil off later.
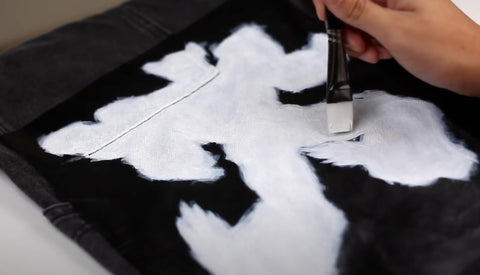
Step 4: Paint Your Base Layers
Angelus Acrylic Paints are fantastic for fabric painting on denim. You can choose to use them straight out of the bottle or mix them with Angelus 2-Soft to keep the surface as soft as possible.
Method 1: Using 2-Soft for a Soft Finish
-
To keep the denim as soft as possible, mix a 1:1 ratio of Angelus Acrylic Paint with 2-Soft. After painting with this mixture, you will need to heat-set the painted product with a heat gun at 300º F for 3-5 minutes (this step is REQUIRED). This method allows the acrylic paint on denim to soak into the fabric fibers effectively.
Method 2: Paint Straight out of the bottle
-
If you're okay with a screen print-like finish, adding Angelus 2-Soft isn’t necessary, and you can just use paint for jeans, straight from the bottle.
Some artists like to do 1-2 layers of their white base coat with a 2-Soft mixture, then apply the rest of the paint for denim straight from the bottle. You can achieve great results with any of these methods, so feel free to try them all out!
With either method, use a dabbing motion to apply the acrylic paint on jeans to avoid leakage under stencil edges. Build the base with multiple thin layers until you achieve a uniform opacity.
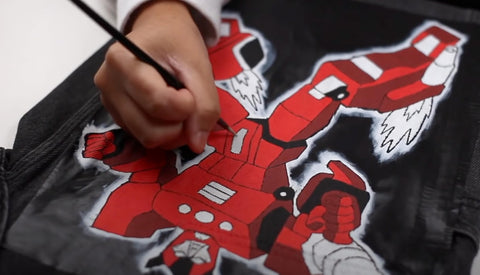
Step 5: Paint Your Design – How to Paint on Denim
No matter which method you used for your base layers, we recommend using Angelus straight of the bottle for any detail work (including color blocking after your initial base coats). This will make your lines much cleaner as opposed to trying to do detail work with a Paint/2-Soft mixture.
Now, it’s time to bring your design to life! How to paint on denim? Follow these steps:
-
Use Acrylic Paint on Denim straight from the bottle for detailed work.
-
Start painting your design onto the denim jacket.
-
Use smaller brushes for details and larger brushes for broader sections.
-
Allow each layer of paint to dry before applying the next.
If you're unsure about freehand painting, you can use stencils or sketch your design with a pencil first. Apply multiple thin layers to build up solid, vibrant colors.
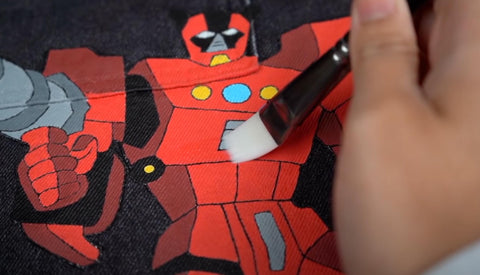
Step 6: Apply a Finisher – How to Seal Acrylic Paint on Denim?
For added durability and a professional finish, many artists apply Angelus 4-Coat Matte or an acrylic finisher over the painted areas. This will protect the paint for denim from wear and weather, giving your jacket a uniform look.
Whether you use a finisher or not, spraying Water & Stain Repellent onto your design helps keep it clean. Make sure all paint and finishers are completely dry before applying this!
FAQs – Common Questions About Painting Denim
Can You Use Acrylic Paint on Jeans / Denim?
Yes! Acrylic paint for jeans works well, especially when mixed with a fabric medium like Angelus 2-Soft to maintain flexibility.
How to Paint a Jeans Jacket?
Follow the step-by-step guide above, ensuring you use best paint for denim, apply multiple thin layers, and seal your work for durability.
What Paint to Use on Denim?
The best paint to use on jeans is fabric paint for denim or acrylic paint for denim, preferably mixed with a fabric medium for a softer feel.
How to Paint Jeans Permanently?
To paint jeans permanently, use fabric paint for jeans or acrylic paint on jeans with 2-Soft, heat-set your design, and apply a finisher.
How to Paint a Denim Jacket?
Use Acrylic Paint on a Jean Jacket, apply thin layers, heat-set if using 2-Soft, and seal the design with a finisher.
Painting a denim jacket with Angelus products gives you a unique piece of clothing and a satisfying DIY project. Whether you’re creating something for yourself or as a gift, the process is a fun and rewarding experience.
Now that you know how to paint jeans, are you ready to create your masterpiece?
Happy Painting! 🎨👖

