Introduction
In this Creator Spotlight, we're diving into how Jose takes trading card binders and transforms them into custom Pokémon masterpieces using Angelus Paint. From prepping the leather surfaces to adding crisp character details. Huge props to Jose for turning everyday binders into showstoppers that any Pokémon collector would be obsessed with!
Jose @4daartist
My art work is an expression of my interest,belief, and experience. I’ve been collecting cards and shoes all my life and I’ve always wanted to make my own. So painting gives me a way to create some of the things I’ve never had. I want my art to capture the beauty and differences of each subject. I use traditional mediums for all my work including charcoal, graphite, Paint, pastels, and ceramics. I strive to master my craft and to challenge myself with every painting. I thank God for this ability and opportunity to leave my mark on the world through my artwork. And although I’ve started my art career late I only want to grow and continue to create.
InstagramCreator Questions
What do you use our products for?
I use your products on almost all my projects shoes, canvas, binders, clothes.
What are your top 5 Angelus products?
Paint, deglazer, finisher, paint, 2thin.
If you could give one piece of advice to aspiring artists, what would it be?
Always keep creating, even when others criticize your work take that as a good thing and keep improving. Because we get better every time we pick up a paintbrush.
How to Create a Custom Binder:
A Step-By-Step Guide
1Prep the Binder Surface
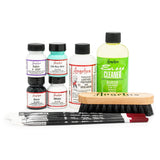
Clean: Wipe down the binder with a damp cloth or Angelus Easy Cleaner to remove dirt, grease, and finger oils. Let it dry completely.
Deglaze: Dampen a rag/ cotton pad with Angelus Leather Preparer & Deglazer and thoroughly wipe down the area you plan to paint. This strips away factory coatings and creates a tacky surface for the paint to grip.

2Paint Your Base & Characters
Lay Down Base Coats: Apply Angelus Acrylic Leather Paint in thin, even layers using a soft-bristle brush or airbrush.
Tip: For dark/ vibrant Pokémon colors (like Pikachu yellow or Charizard orange), lay down a thin coat of Angelus Flat White first to make the colors pop!
Build Up Details: Let each layer dry completely before applying the next (usually 10–15 minutes). It typically takes 2–4 thin coats for full coverage.
Fine Lines & Details: Use detail brushes or paint pens filled with Angelus Paint to trace outlines, highlights, and shadow work.

3Seal with a Durable Finisher
Apply 4-Coat Finish: Stir (do not shake) your choice of Angelus 4-Coat Finish (Matte, Satin, Gloss, or High Gloss).
Layer While Tacky: Apply 2–3 thin, slightly heavier coats using a brush, foam brush, or airbrush. Apply each subsequent coat within 10–15 minutes while the previous layer is still slightly tacky so they bond together into a tough shield.

4Cure & Maintain
Let It Cure: Allow the binder to air cure for 24-48 hours before inserting cards, flexing the spine, or taking it to a local tournaments.

Unlock More Inspiration
Dive deeper into our Creator Spotlight series and discover new tutorials from top artists in the community. Whether you're looking to master advanced techniques or spark fresh ideas, these step-by-step guides will take your custom game to the next level.
Creator Spotlights