Wall murals have long been a powerful form of artistic expression, capable of completely transforming a space. Whether it’s a cozy corner of your living room or a sprawling wall in a commercial space, murals bring personality, energy, and visual impact. Beyond decoration, murals can convey themes, tell stories, and elevate moods, making them an ideal choice for those looking to breathe new life into their environments. With a bit of planning, creativity, and the right techniques, anyone can design a stunning wall mural using paints, turning blank walls into bold statements.

Planning Your Mural
Evaluating Your Space
Before diving into the world of home mural painting, it's crucial to evaluate your space thoughtfully. Consider the wall’s size and shape—larger walls accommodate complex, detailed designs, while smaller walls may benefit from minimalist or abstract styles. Pay attention to lighting, both natural and artificial, as it affects how colors appear throughout the day. Additionally, consider the room’s function. For instance, calming nature scenes might suit a bedroom, while dynamic geometric patterns could energize a creative studio.
Evaluate the wall's surface condition as well. Smooth, primed walls offer the best results, while textured walls may require additional prep work. Make note of any fixtures, furniture, or windows that could impact your design's layout.
Choosing a Theme
A well-chosen theme sets the tone for your entire mural. Begin by exploring your interests, passions, and the atmosphere you want to create. Common mural themes include:
-
Nature & Landscapes: Forests, mountains, oceans.
-
Abstract Designs: Shapes, color blocks, and freeform lines.
-
Urban & Street Art: Graffiti-inspired visuals and bold lettering.
-
Whimsical Scenes: Suitable for children’s rooms or creative spaces.
-
Cultural or Historical Art: Celebrates heritage or historical events.
Browse inspiration sources like design magazines, online galleries, or even public murals in your community. Create a vision board to gather color palettes, motifs, and styles that resonate with you.
Design Preparation
Sketching the Concept
Once you have a theme, it’s time to bring your idea to life through sketching. Start with rough drafts on paper or digital tools like Procreate or Photoshop. Focus on composition, flow, and balance rather than perfection.
For beginners, consider using grid paper to break down your design into manageable sections. This helps maintain proportions when scaling up. If you prefer digital sketches, overlay your design on a photo of the wall for a visual mock-up.
Technological Aids
Technology makes mural design more accessible than ever. A digital projector can project your design directly onto the wall, allowing you to trace outlines accurately. Make sure the image is properly scaled and adjusted to fit the space. In low-light settings, this method can save hours of manual mapping.
Alternatively, use carbon or tracing paper to transfer designs, especially for intricate elements. The grid method is another effective technique: draw a proportional grid on your sketch and replicate it on the wall for precise layout.

Materials and Preparation
Selecting Paints and Brushes
High-quality materials are essential for a lasting and vibrant mural. For indoor murals, acrylic paints are a top choice due to their quick drying time, durability, and vivid colors. For outdoor murals, use weather-resistant paints formulated to withstand the elements.
When selecting brushes, variety matters. Use large flat brushes for backgrounds, medium-sized for filling shapes, and fine brushes for detailing. Specialty tools like sponges or palette knives can create unique textures.
Primers are also vital. Applying a primer ensures better paint adhesion and helps colors pop, especially when painting over dark walls or porous surfaces.
Workspace Setup
Prepare your painting area to ensure a smooth workflow. Use drop cloths to protect floors and furniture. Ensure proper ventilation, especially when using solvent-based products. Organize your paints, brushes, water containers, and cleaning supplies within easy reach. Wear protective gear like old clothes, gloves, and masks to avoid paint exposure.
Before painting, clean the wall thoroughly with mild soap and water to remove dust and grease. Repair any holes or cracks with filler and sand down rough areas for a smooth finish. Finally, apply a base coat or primer and let it dry completely.
Painting Your Mural
Step-by-Step Guide
-
Start with Background: Paint the large background areas first using flat brushes or rollers. This sets the tone and foundation.
-
Add Mid-Ground Elements: Move on to medium-sized shapes or designs. Use painter’s tape for crisp lines if needed.
-
Foreground Details: Focus on the focal point of your mural. These are the elements that draw attention.
-
Layer Colors: Apply multiple layers for opacity and vibrancy. Let each layer dry before adding another.
Work from top to bottom to avoid smudging and take regular breaks to assess progress. Lighting is key; step back periodically to view the mural as a whole.
Advanced Techniques
-
Blending: Blend colors using a wet brush to create seamless transitions.
-
Texturing: Use sponges, rags, or stippling brushes for depth.
-
Stenciling: Pre-cut stencils can add intricate patterns quickly.
-
Dry Brushing: For subtle highlights or weathered effects.
These techniques add complexity and professional flair to DIY wall mural projects, making them stand out as genuine works of art.
Detailing and Finishing Touches
Enhancing Details
The magic of a mural often lies in the small, intricate details that bring the entire composition to life. Once the primary shapes and colors are in place, dedicating time to fine-tuning your work can significantly elevate the final result. Use fine-tipped brushes to meticulously define lines, create subtle shading, and add highlights that reflect your chosen light sources. Carefully considering where light and shadow fall within your design not only makes your mural appear more realistic but also introduces a sense of depth and three-dimensionality.
Contrast plays a crucial role in making your artwork visually dynamic. Strive for a balanced interplay between bold, vibrant hues and softer, more subdued tones. Similarly, vary the use of light and dark shades to guide the viewer’s gaze across key focal points. Don’t be afraid to layer in extra touches such as intricate patterns, diverse textures, or hidden symbols—these elements invite closer inspection and can imbue your mural with a sense of mystery or narrative complexity that keeps viewers engaged.

Review and Adjustments
Once the main painting phase is complete, take a step back—literally—and assess the mural as a whole. Viewing your work from a distance allows you to identify inconsistencies, imbalances, or overlooked areas that may require refinement. Even minor touch-ups, such as smoothing out lines or enhancing color saturation, can make a remarkable difference in the mural’s overall impact.
It’s also beneficial to invite others to provide feedback. A fresh set of eyes can offer new perspectives and help spot subtle imperfections or areas for improvement that you may have become too familiar with to notice. Constructive critique at this stage can elevate the quality of your mural from good to exceptional.
Protecting and Maintaining Your Mural
Sealing the Mural
After investing significant time and creative energy into your mural, it’s essential to take steps to preserve it. Applying a protective sealant not only shields the surface from potential damage, fading, and environmental wear but also enhances the vibrancy of your colors.
Choose a clear acrylic sealer compatible with the type of paint you’ve used. These sealers are available in different finishes, including matte, satin, and gloss, allowing you to select the one that best complements your artistic vision. When applying the sealant, ensure an even coat by using a brush, roller, or spray, and always work systematically from top to bottom to avoid streaking.
For outdoor murals, opt for sealers specifically formulated to be UV-resistant and waterproof, ensuring your artwork withstands exposure to sunlight, rain, and other elements. Allow the mural to dry completely for 24 to 48 hours before sealing, and make sure the sealant has fully cured before placing objects or fixtures nearby to avoid any damage or sticking.
Maintenance Tips
Proper maintenance is key to ensuring your mural continues to captivate viewers and retains its brilliance over time. Here are some essential upkeep practices:
-
Regular Dusting: Keep the surface clean by gently wiping it with a soft cloth or using a duster to remove accumulated dust and debris.
-
Spot Cleaning: For stains or marks, use a mild soap diluted in water, and carefully blot the area with a soft sponge. Avoid abrasive scrubbers or harsh chemical cleaners that could damage the paint or sealant.
-
Avoid Direct Sunlight: For indoor murals, try to minimize prolonged exposure to direct sunlight, which can cause colors to fade over time. Consider using curtains, blinds, or UV-filtering window films to protect your artwork.
-
Periodic Touch-Ups: Depending on location and exposure, some fading or wear is inevitable. Plan for occasional touch-ups every few years to restore any lost vibrancy and ensure the mural remains in peak condition.
By following these steps and treating your mural with care and attention, you can preserve its beauty and impact for many years, ensuring that your artistic efforts continue to inspire and delight all who view it.

Designing a stunning wall mural is a deeply rewarding DIY experience. It combines artistry with personal expression and transforms any space into something extraordinary. With thoughtful planning, the right tools, and a touch of patience, anyone can create large-scale wall art that captures attention and admiration.
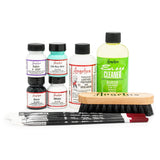
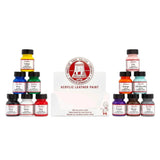
Creative mural ideas are limitless—whether you're inspired by nature, geometry, or abstract visuals, there's always a design that fits your vision. For those looking to customize materials, high-quality paints and tools from trusted brands like Angelus Direct can elevate your project with reliable, vibrant results. So pick up those brushes, unleash your imagination, and bring your walls to life. Your next masterpiece awaits.
FAQs
1. Best paints for different mural locations?
For indoor murals, acrylic paints are ideal due to their quick drying and vibrant color. For outdoor murals, weather-resistant, UV-protected paints are essential to withstand the elements. Products from Angelus Direct, especially their acrylic lines, offer excellent versatility and coverage for various surfaces.
2. How to choose a mural theme?
Consider your personal interests, the room's purpose, and the mood you want to evoke. Themes can range from serene landscapes and bold abstracts to cultural motifs and whimsical scenes. Create an inspiration board to refine your vision.
3. Can you paint over existing paint?
Yes, but preparation is key. Clean the surface, sand if necessary, and apply a primer. This ensures your mural paint adheres well and maintains color accuracy.
4. Common mural painting mistakes?
Skipping wall prep, using low-quality paints, ignoring lighting conditions, and rushing through details are common pitfalls. Always plan, test colors, and take your time.
5. Maintenance schedule for murals?
Dust regularly, spot clean as needed, and reseal every few years. Touch up faded areas periodically to keep your mural looking fresh and vibrant over time.