To mix Angelus 4-Coat into Angelus Paint for added flexibility, first select the appropriate 4-Coat sheen, then prepare the surface thoroughly and test the mixture on your specific material to ensure compatibility. Measure 90% Angelus Paint and 10% Angelus 4-Coat, shake both bottles thoroughly, and stir until the mixture is completely blended. If needed, adjust the consistency using only a compatible paint thinner before application.
While this technique can improve flexibility and wear resistance in demanding applications, Angelus Paint is already formulated to deliver excellent durability, flexibility, and adhesion on compatible surfaces when applied to a properly prepared surface. For most customization projects, Angelus Paint alone provides the performance needed to achieve a long-lasting, professional finish.
For projects that experience extreme flexing, heavy abrasion, or repeated stress beyond typical wear, however, mixing Angelus 4-Coat into the paint is an optional, advanced technique. Although 4-Coat is designed primarily as a protective topcoat rather than a standard paint additive, it can be incorporated into Angelus Paint to create a more durable, urethane-strength paint mixture when additional flexibility and wear resistance are desired.
Who Is This Technique For?
Mixing Angelus 4-Coat into Angelus Paint is intended for advanced projects that require additional flexibility and durability beyond what Angelus Paint alone provides. It is best suited for items that experience extreme flexing, heavy abrasion, or repeated stress, such as frequently worn footwear, motorcycle gear, athletic equipment, or other high-wear leather goods. For most leather customization projects, Angelus Paint can be used on its own without adding 4-Coat. Mixing 4-Coat into the paint is an optional technique for applications where increased wear resistance is desired.
Pros and Cons of Mixing Urethane (4-Coat) Into Acrylic Paint
Pros of mixing urethane into acrylic paint include increased flexibility, added abrasion resistance, integrated protection, and a smoother surface feel, while the cons include a shorter working time, a less forgiving application process, the need for precise measurements, and limited availability. Understanding these advantages and limitations can help you decide whether this technique is appropriate for your project.
Pros
-
Increased Flexibility Under Extreme Stress: The urethane polymers from 4-Coat allow the paint film to stretch and recover more aggressively than acrylic alone, which benefits surfaces that flex repeatedly under heavy load.
-
Added Abrasion Resistance: The urethane component hardens the paint film slightly, giving it stronger resistance to scuffing and surface friction on high-contact areas.
-
Integrated Protection: Because the protective properties are mixed into the paint layer rather than applied on top, touch-ups blend more seamlessly without the need to strip and reapply a separate topcoat.
-
Smoother Surface Feel: The urethane content produces a slightly smoother, more uniform tactile finish compared to acrylic paint alone.
Cons
-
Shorter Working Time: Once mixed, the urethane begins a chemical cure. The batch should be used within 24 hours, and performance degrades the longer it sits. Standard Angelus Paint has no such limitation when stored properly.
-
Less Forgiving Application: Errors in measurement, mixing, or application thickness are harder to correct. Too much 4-Coat can cause clouding, inconsistent sheen, or adhesion problems. Standard paint is far more tolerant of minor application variations.
-
Requires Precise Measurement: The 90/10 ratio must be followed accurately. Eyeballing the amounts risks ruining a batch. Standard Angelus Paint requires no mixing ratios at all.
-
Not Easily Reversible: Once the urethane-laced mixture cures, it is more difficult to strip and redo compared to standard acrylic paint layers.
-
Recommended for Professional Use: Due to the tighter tolerances, chemical cure behavior, and reduced margin for error, this technique is best handled by experienced painters. Beginners are better served by applying standard Angelus Paint with proper prep, then sealing with a separate 4-Coat topcoat if added protection is desired.
What Should You Know Before Mixing Angelus Paint With 4-Coat?
Before mixing Angelus Paint with 4-Coat, understand that 4-Coat is engineered as a protective topcoat, comes in four sheen options, and should be shaken thoroughly with Angelus Paint before combining. Prepare the surface properly, test the mixture on your specific material, choose the mixing ratio based on your project's needs, allow the mixture to fully cure before use, and remember that Angelus Paint will not adhere to a cured layer of 4-Coat afterward.

8 key factors you should know before mixing Angelus paint with 4-Coat are:
-
4-Coat Is Designed as a Topcoat, Not a Paint Additive
-
4-Coat Comes in Four Sheens, Choose Before Mixing
-
Shake Both Products Thoroughly Before Combining
-
Surface Prep Still Matters Even With the Mix
-
Test Compatibility on Your Specific Material First
-
Mixing Ratio May Need Adjusting Based on Project Type
-
The Mix Still Needs Full Cure Time Before Use
-
Paint Will Not Adhere on Top of Cured 4-Coat Afterward
What Tools and Materials Do You Need for the 90/10 Mix?
Tools required for the 90/10 Angelus Paint + 4-Coat Mix include measuring cups, a mixing container, a stir stick, a synthetic brush, and a soft cloth, while materials include Angelus Standard Paint, Angelus 4-Coat (Flat, Matte, Satin, or High Gloss), Isopropyl Alcohol or Acetone, and Scrap Material for Testing. Having these tools and materials ready before you begin allows you to measure the 90/10 ratio precisely, mix the products evenly, and maintain consistent application from the first coat to the last. It also creates a smoother workflow by reducing interruptions, limiting measurement errors, and helping keep the paint mixture clean and free from contamination throughout the process.

Tools
-
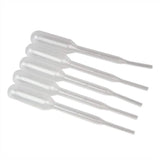
Measuring Cups or Syringe
-
Mixing Container
-
Stir Stick or Palette Knife
-
Synthetic or Taklon Brush
-
Soft Cloth or Cotton Wool
Materials
-
Angelus Standard Paint
-
Angelus 4-Coat (Flat, Matte, Satin, or High Gloss)
-
Isopropyl Alcohol or Acetone
-
Scrap Material for Testing
Step-by-Step Mixing Guide: 90% Angelus Paint + 10% Angelus 4-Coat

To mix 90% Angelus Paint with 10% Angelus 4-Coat, first determine your project size and calculate the ratio, gather the required tools and materials, shake both products, and measure and combine the paint with 4-Coat. Next, mix until fully blended, check the consistency, test the mixture, and finally apply it to your project. Following each step in the correct order helps create a uniform mixture, maintain the intended 90/10 ratio, and produce a paint blend with added flexibility and abrasion resistance for high-wear applications.
-
Step 1: Determine Your Project Size and Calculate Paint + 4-Coat Amounts
Before pouring anything, estimate the total volume of liquid required to complete your project, whether it is small touch-ups, full sneaker customs, leather bags, or furniture restoration. Because this mixture begins to chemically cure once combined, you should only mix what you intend to use on the same day. Calculate your amounts using a strict 9:1 mathematical ratio. Every 10 parts of mixture should contain 9 parts Angelus Paint and 1 part Angelus 4-Coat. For example:
-
10 mL mixture = 9 mL Angelus Paint + 1 mL Angelus 4-Coat
-
20 mL mixture = 18 mL Angelus Paint + 2 mL Angelus 4-Coat
-
50 mL mixture = 45 mL Angelus Paint + 5 mL Angelus 4-Coat
Measure each component using the same unit throughout the process. Whether you work in milliliters, ounces, or syringe markings, consistent measurements help maintain the intended ratio.
-
Step 2: Gather Your Mixing Tools and Materials
Clear your workspace of dust and debris to ensure you have a flat, stable surface to work on. Line up your clean mixing containers, syringes or graduated measuring cups, a palette knife, your chosen 4-Coat sheen, and your paint colors so everything is within easy reach before you begin. Before measuring the products, confirm that the selected 4-Coat sheen (Flat, Matte, Satin, or High Gloss) matches the appearance you want for the finished project.
Choosing the correct sheen at this stage helps ensure a consistent final look. Having these mixing tools staged prevents you from scrambling mid-process and minimizes the time the raw products are exposed to open air, which can cause premature skinning or clumping. Working in an organized, well-lit, and ventilated area also reduces the risk of spills, contamination, and measurement errors.
-
Step 3: Shake Both Products Thoroughly Before Opening
Both acrylic paint pigments and the advanced urethane matting agents in 4-Coat naturally settle and separate over time. Agitate both bottles vigorously for at least 60 seconds while they remain sealed to fully resuspend all components.
If the bottles have been sitting for an extended period, tap the bottoms firmly to loosen any packed sediment before shaking again until the liquid sounds completely fluid and uniform. After pouring both products into the mixing cup, stir the mixture slowly with a palette knife or stir stick until the paint and 4-Coat are fully integrated. Avoid vigorous stirring or shaking after mixing, as excessive air can introduce bubbles that affect the finish.
-
Step 4: Measure and Pour Paint First, Then 4-Coat
Always treat the paint as your base medium by measuring out your 90% paint component first using a graduated cup or clean syringe. Transfer it into your mixing container before introducing any 4-Coat.
Next, use a separate, dry syringe to measure 10% of the 4-Coat and slowly add it directly into the center of the paint. Pouring the paint first creates a larger volume for the denser 4-Coat to integrate into, reducing the chance of it sticking to the container walls and ensuring a more accurate blend.
-
Step 5: Mix Until Fully Blended (No Streaks, No Separation)
Using your stir stick or a flexible palette knife, blend the two liquids using a slow, deliberate circular motion. Be sure to scrape the bottom edges and internal corners of the container where unmixed 4-Coat loves to hide. Continue stirring for a full 2 to 3 minutes.
Avoid whipping the mixture aggressively, as introducing excess air creates micro-bubbles that will trap inside the paint film and mar your finish during application. Inspect the liquid carefully as it must appear completely homogeneous, with no visible streaks or separation.
-
Step 6: Check Consistency and Adjust if Needed
Once fully blended, evaluate the mixture's viscosity before application. The addition of 4-Coat can slightly thicken the paint depending on the pigment density, so it should flow smoothly and evenly when tested.
For brush application, aim for a consistency similar to heavy cream, while airbrush use may require thinning to a skim milk consistency. If needed, add a small amount of a dedicated paint thinner or airbrush medium rather than altering the 4-Coat ratio.
-
Step 7: Test on a Scrap Piece of the Same Material
Never apply a freshly mixed batch directly to your final project without testing. Apply a small amount onto a scrap piece that matches your project surface, such as leather or canvas, to evaluate performance.
Allow the test patch to dry completely, then inspect it under direct lighting to confirm color accuracy and sheen. This step helps ensure the mixture behaves as expected before committing to the full application.
-
Step 8: Apply to Your Project in Thin, Even Coats
Before applying the paint, thoroughly clean the surface with Angelus Preparer and Deglazer or another suitable cleaner to remove finishes, dirt, oils, and contaminants that may affect adhesion. Apply the mixture using a fine-bristled brush or airbrush in thin, overlapping passes, building coverage with multiple light coats to avoid cracking, clumping, cloudiness, or peeling.
Allow each coat to dry for 10 to 15 minutes before applying the next. Once full coverage is achieved, apply one or two light coats of pure Angelus 4-Coat for added durability and desired sheen. Let the finished piece cure for at least 24 hours before use to ensure maximum performance and longevity.
Quick-Reference Mixing Ratio Table
Use the table below to quickly calculate the correct amount of Angelus Paint and Angelus 4-Coat for common batch sizes. Maintaining the 90:10 ratio helps produce a consistent mixture across small touch-ups, full customizations, and larger restoration projects.
|
Target Total Volume |
Angelus Standard Paint (90%) |
Angelus 4-Coat Sealer (10%) |
Best For |
|
Small Detail Batch |
90 Drops |
10 Drops |
Fine line work, swoosh touch-ups |
|
0.5 oz (approx. 15 ml) |
13.5 ml |
1.5 ml |
Small logos, panels, or minor accents |
|
1.0 oz (approx. 30 ml) |
27.0 ml |
3.0 ml |
Full sneaker toe-boxes and side panels |
|
2.0 oz (approx. 60 ml) |
54.0 ml |
6.0 ml |
Pair of custom shoes, small bags, or apparel |
|
4.0 oz (approx. 120 ml) |
108.0 ml |
12.0 ml |
Large leather jackets, armor pieces, or props |
Standard Paint vs. 4-Coat Topcoat vs. the 90/10 Mix: What’s the Difference?
Standard Angelus Paint is formulated to provide color and coverage on leather and other compatible surfaces, whereas Angelus 4-Coat Topcoat is a clear urethane protective coating that improves scratch resistance, durability, and final sheen without adding color. Standard Angelus Paint provides durable performance for most projects when proper preparation and application techniques are followed.
The 90/10 Angelus Paint + 4-Coat Mix is intended for applications that demand additional flexibility or abrasion resistance by combining the paint's coloring capability with a portion of the protective properties of 4-Coat while maintaining excellent workability. Understanding the differences among these three options helps you choose the right product or combination based on whether your priority is color application, surface protection, or a balance of both.
|
Feature |
Standard Paint Alone |
Traditional Paint + 4-Coat Topcoat |
The 90/10 Hybrid Mix |
|
Application Steps |
Straightforward (paint only) |
Dual-phase (paint, dry, then seal) |
Requires precise mixing before application |
|
Abrasion Resistance |
Strong for everyday and moderate-wear applications |
Maximum surface protection |
Added resistance for extreme-wear applications |
|
Flexibility / Creasing |
Flexible when applied correctly in thin coats |
High (topcoat protects underlying paint) |
Additional flex tolerance for high-stress areas |
|
Surface Appearance |
Clean, natural paint finish |
May show topcoat brush lines if over-applied |
Smooth, uniform finish |
|
Touch-Up Simplicity |
Easy, paint directly over previous coats |
More involved (topcoat may need blending) |
Seamless (color and sealer combined) |
|
Ease of Use |
Beginner-friendly with proper prep |
Moderate (requires timing between phases) |
Advanced (precise ratios, limited working time) |
|
Error Tolerance |
Forgiving of minor application variation |
Moderate |
Low, requires accurate measurement and technique |
Which 4-Coat Sheen Should You Use in the Mix?
4-Coat sheen you should use in the Angelus Paint + 4-Coat Mix includes Flat 4-Coat, Matte 4-Coat, Satin 4-Coat, and High Gloss 4-Coat. Each of these 4-Coat sheen options offers a different level of shine and reflectivity, allowing you to tailor the final look of your project. Selecting the right sheen ensures your finish aligns with your desired aesthetic while still providing the protective benefits of the 4-Coat.

The types of 4-Coat Sheen you should use for Angelus Paint + 4-Coat Mix are:
-
Flat 4-Coat
Blending Flat 4-Coat into Angelus Paint + 4-Coat Mix cuts out nearly all light reflection, resulting in a dead-matte, non-reflective appearance. This option is engineered specifically to eliminate the cheap, plasticky glare often associated with acrylic paints. Stripping away reflectivity provides the ideal finish for tactical equipment, modern stealth aesthetics, and military gear. It is also highly effective for casting deep, dark shadows on display pieces and props where zero environmental light bounce is desired.
-
Matte 4-Coat
Incorporating the Matte 4-Coat for Angelus Paint + 4-Coat Mix delivers a soft, low-gloss finish with just a subtle hint of smooth-surface reflection. It is the industry-standard selection for custom sneaker artists because it flawlessly replicates the premium, factory-fresh finish of luxury leather shoes right out of the box. This mixture strikes an exact visual balance, providing just enough light dispersion to make colors look rich and intentional without making the treated material look artificially coated or unnaturally shiny.
-
Satin 4-Coat
Mixing Satin 4-Coat with Angelus Paint creates a mid-level sheen that offers a distinct, semi-gloss factory glow, striking a perfect bridge between flat and high-shine. This sheen adds valuable depth to your color mix, making it exceptionally well-suited for luxury leather handbags, streetwear apparel, and automotive interior restorations. It brings out the natural contours of the underlying material, giving it a conditioned, supple appearance that looks clean and high-end without ever appearing greasy or wet.
-
High Gloss 4-Coat
Adding High Gloss 4-Coat for Angelus Paint mix dramatically boosts your paint's light reflectivity, creating a deep, glass-like shine with intense clarity. It maximizes the vividness of underlying pigments, making it the premier choice for patent leather restorations, eye-catching cosplay armor, and metallic accents. The embedded gloss polymers create an ultra-smooth surface that reflects light crisply, ensuring your custom display art pieces and high-visibility projects command attention with a bold, polished pop.
Best Use Cases for the 90/10 Angelus Paint + 4-Coat Mix
The 90/10 Angelus Paint + 4-Coat mix is best suited for custom sneakers and shoes, leather goods and apparel, art and display pieces, and leather furniture restoration. While Angelus Paint performs well on most leather customization projects, the 90/10 mix is an optional choice for items expected to experience frequent flexing, abrasion, or heavy use. The added 4-Coat helps improve scratch resistance, flexibility, and finish quality, making the mixture a practical option for projects that demand additional performance under these conditions.
Best use cases for the 90/10 Angelus Paint + 4-Coat mix includes:
-
Custom Sneakers and Shoes
Applying the 90/10 mix to sneaker and shoe areas such as the toe box, side panels, and heel sections allows the paint to flex naturally with foot movement without cracking. Because the matte or satin agents are incorporated directly into the paint layer, the finish maintains a consistent, factory-fresh appearance even after extended wear. This helps eliminate the patchy or uneven look that can occur when a separately applied topcoat gradually wears away.
-
Leather Goods and Apparel
Leather jackets, belts, wallets, watch bands, and similar accessories are constantly handled and exposed to body heat, friction, and everyday movement. While Angelus Paint performs well on properly prepared leather, projects exposed to constant friction and flexing may benefit from the added protection of the 90/10 mix. By incorporating urethane polymers into the paint, the 90/10 mix creates a smoother, more premium-feeling finish while improving flexibility. As a result, apparel can bend, fold, and drape naturally, while frequently used accessories gain additional resistance to scratches and abrasion.
-
Art and Display Pieces (canvas, props, cosplay)
For costume armor, cosplay props, mixed-media canvases, and display pieces, the 90/10 mix delivers a durable, uniform finish that performs well under convention lighting and repeated handling. The blended coating spreads evenly across large surfaces, reducing the likelihood of visible brush strokes, uneven sheen, or cloudy areas that can result from hurried topcoat application. It also helps preserve vibrant colors, protects metallic pigments from premature dulling, and reduces the risk of chips or surface damage during transport and display.
-
Leather Furniture Restoration
The 90/10 mix provides a finish that can withstand heavy weight, sliding friction, and accidental spills, making it perfect for restoring high-traffic surfaces like leather couches, armrests, and car seats. For large, high-traffic leather surfaces, the optional 90/10 mix provides additional flexibility and abrasion resistance while maintaining a consistent finish. This hybrid mixture sinks beautifully into leather pores, providing an ultra-durable, breathable coating that resists cracking under pressure and maintains a clean, uniform, professional upholstery look.
What Should You Avoid When Mixing Angelus Paint and 4-Coat?
Mistakes to avoid when mixing Angelus Paint and 4-Coat include skipping surface preparation, adding too much or too little 4-Coat to the mix, applying the mixture in thick layers, and not letting each coat dry before adding another. Avoiding these common mistakes helps maintain the correct paint consistency, improves adhesion and finish quality, and reduces the risk of cracking, peeling, uneven sheen, or premature coating failure.
8 common mistakes to avoid when mixing Angelus Paint and 4-Coat are:
-
Skipping Surface Prep Before Painting
-
Adding Too Much or Too Little 4-Coat to the Mix
-
Applying the Mixture in Thick Layers
-
Not Letting Each Coat Dry Before Adding Another
-
Skipping the Patch Test on Scrap Material
-
Using a Heat Source to Speed Up Drying
-
Wearing or Using the Item Before Full Cure Time
-
Not Shaking or Stirring the Products Before Mixing
Frequently Asked Questions
-
Can I Mix Angelus 4-Coat Directly Into Angelus Paint?
Yes, a 90% paint to 10% 4-Coat mixture can be used when additional flexibility or abrasion resistance is desired for demanding applications. Measure both products accurately and mix thoroughly until uniform. For most projects, standard Angelus Paint applied with proper surface preparation performs well without mixing.
-
Will the 90/10 Mix Change the Color of My Paint?
No, a 90/10 mix will not shift the color pigment. When mixed properly, Angelus 4-Coat primarily enhances the coating's protective properties rather than altering the pigment. However, the selected 4-Coat sheen (Flat, Matte, Satin, or High Gloss) can influence how the finished color appears by changing the level of surface reflectivity.
-
Can I Still Use an Airbrush With the 90/10 Mix?
Yes, the 90/10 mixture can be applied with an airbrush if it has the proper spraying consistency. Depending on the paint color, pigment density, and airbrush nozzle size, you may need to add a compatible reducer or airbrush medium. Always test the mixture before spraying your final project to ensure smooth atomization and even coverage.
-
Do I Still Need a Topcoat After Using the 90/10 Mix?
No, you do not need a topcoat after using the 90/10 mix, as Angelus Paint is designed to perform well on its own when the surface is properly prepared. Mixing in 4-Coat is optional and provides additional flexibility and protection for demanding applications. A separate 4-Coat topcoat can still be applied if extra surface protection or a specific sheen is desired.
-
How Long Does the Mixed Paint Last Once Mixed?
The mixed paint lasts 24 hours once mixed. Within this time period, the paint should be used. Although unused paint may remain usable for a limited period if stored in a tightly sealed container, performance can vary depending on storage conditions and contamination during mixing. Mixing only the amount needed for your current project helps maintain consistency and reduces unnecessary waste.
-
Can I Use This Technique on Surfaces Other Than Leather?
Yes, the 90/10 mixing technique can also be used on other compatible surfaces that Angelus Paint is designed for, including canvas, properly prepared vinyl, certain plastics, and similar materials. As with any new substrate, perform a patch test first to verify adhesion, appearance, and compatibility before completing the entire project.
-
What’s the Difference Between 4-Coat as a Topcoat vs. Mixing It In?
Using 4-Coat as a topcoat means it is applied over fully cured paint to create a separate protective layer that enhances scratch resistance, durability, and the final sheen, while mixing 4-Coat directly into the paint incorporates a portion of those protective properties throughout the paint layer itself. Many users combine both techniques by mixing a small amount into the paint and applying a final topcoat after the paint has cured for maximum durability.
-
Can I Go Above 10% 4-Coat in the Mix?
Yes, while it is technically possible to add more than 10% Angelus 4-Coat, it is generally not recommended as exceeding the recommended ratio may affect the paint's consistency, workability, and overall application characteristics. For most projects, the 90/10 ratio provides a balanced combination of color performance, flexibility, and added durability. If additional surface protection is needed, applying a separate coat of Angelus 4-Coat after the paint has cured is generally a better approach than increasing the amount mixed into the paint.